Spring技术总结02-IoC 一、概述 Ioc:Inverse of Control的简写,为 控制反转,指把创建对象交给Spring进行管理。即不通过new 对象的方式在dao、service等Impl类中获取对象,而是通过读取xml文件 或者配置类 的方式创建一个统一管理所有对象的ApplicationContext类 ,通过**getBean()**的方法获取所需对象。
Spring中的IoC容器就是IoC思想的一个落地产品实现。IoC容器中管理的组件也叫做bean。
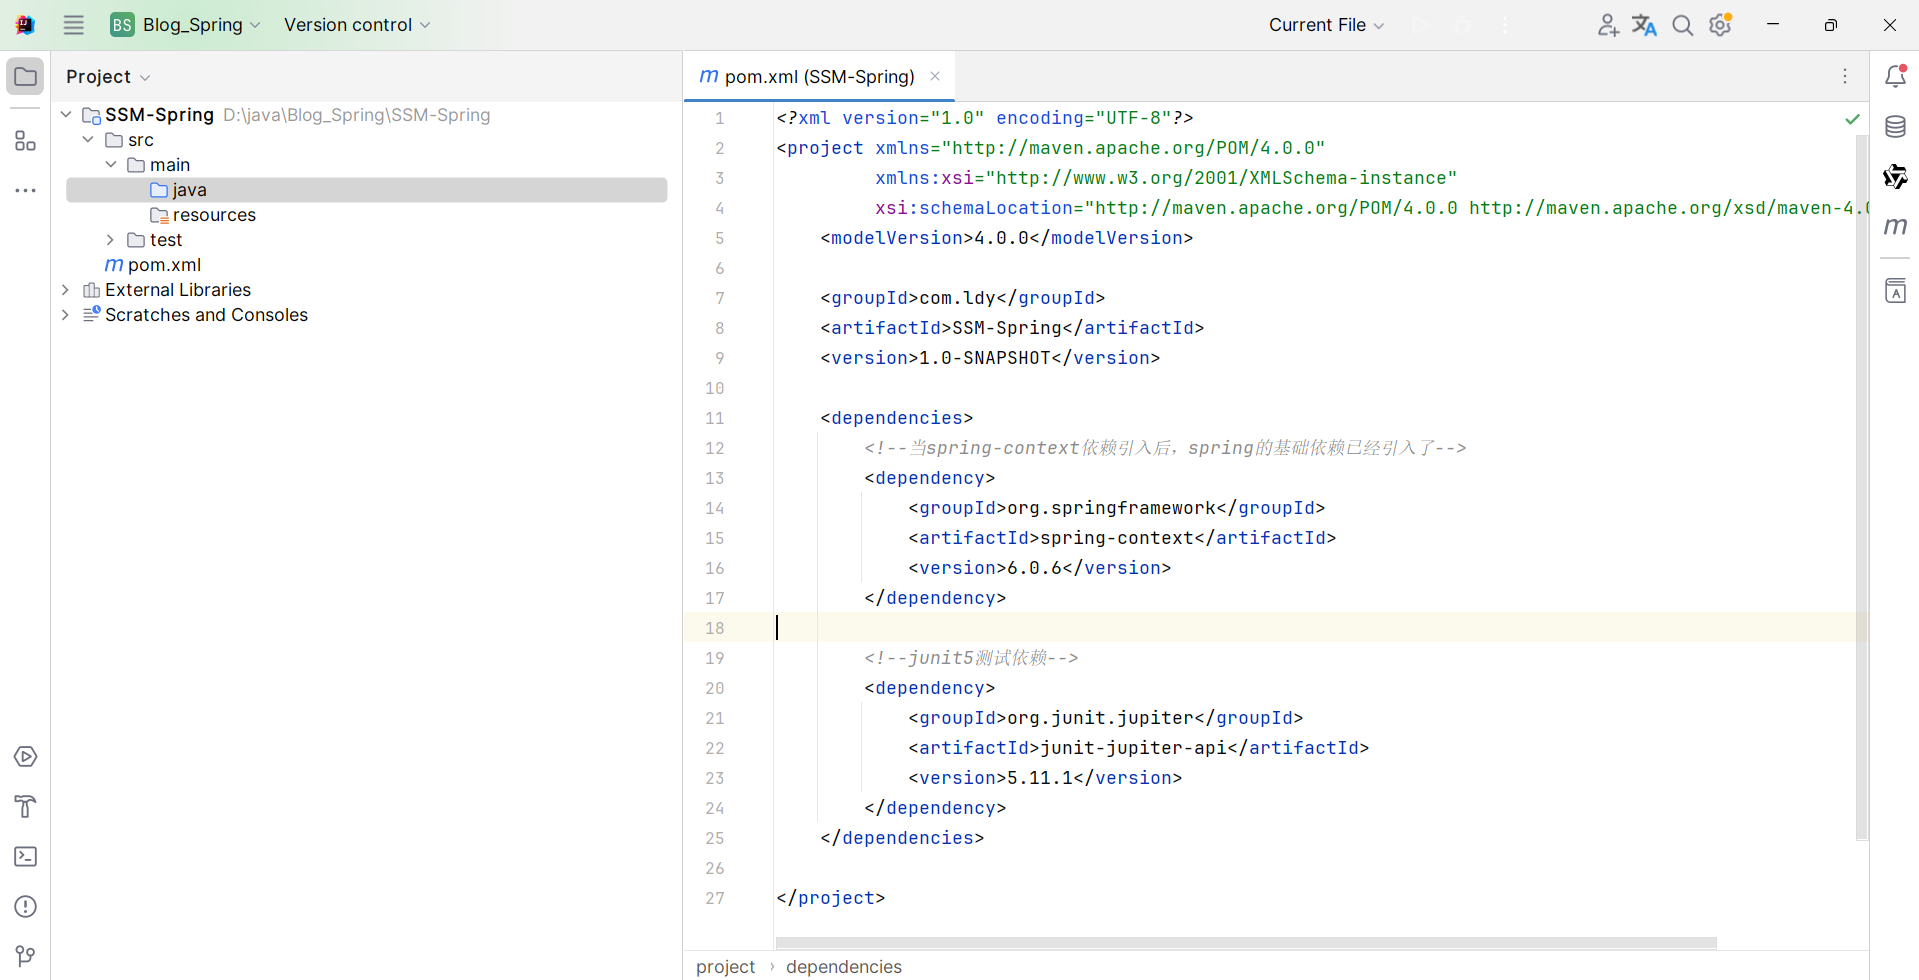
二、基于xml方式管理bean 1.环境搭建 1.根据上一篇文章,已经按要求重新创建了一个项目。
2.创建实体类和xml配置文件
配置文件创建方式如下图
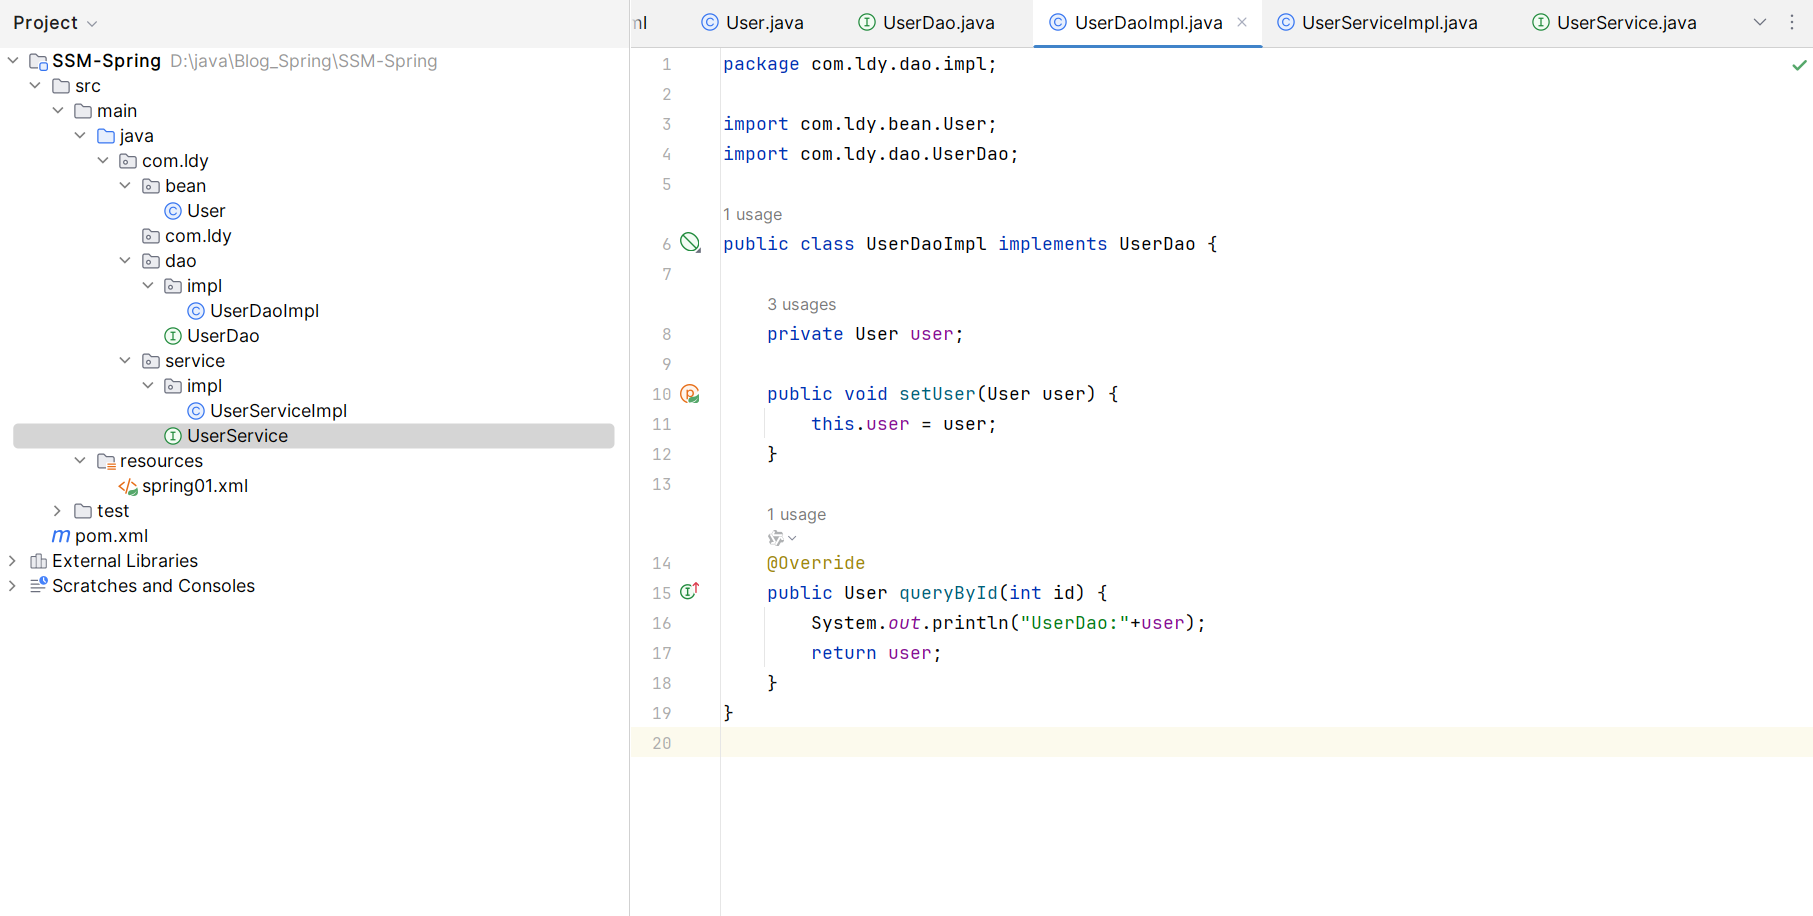
实体类创建
2.管理bean对象——基本操作 在spring01.xml上编写语句
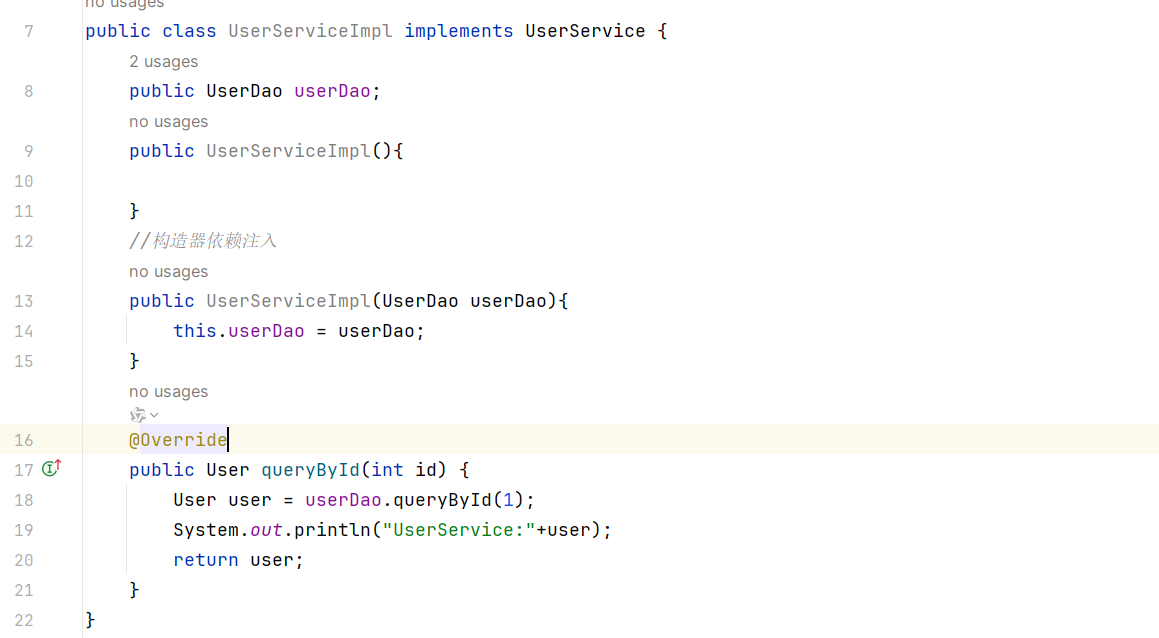
1 2 3 4 5 6 7 8 9 10 11 12 13 14 15 16 17 18 19 20 21 22 23 24 25 26 27 28 29 30 31 32 33 34 35 36 37 38 39 40 41 42 43 44 45 46 47 48 49 50 51 52 53 54 55 56 57 58 59 60 61 62 63 <bean id ="user1" class ="com.ldy.bean.User" /> <bean id ="user2" class ="com.ldy.bean.User" > <property name ="name" value ="白小纯" /> <property name ="age" value ="18" /> <property name ="id" value ="1" /> <property name ="sex" value ="男" /> </bean > <bean id ="userDao" class ="com.ldy.dao.impl.UserDaoImpl" > <property name ="user" ref ="user2" /> </bean > <bean id ="userService" class ="com.ldy.service.impl.UserServiceImpl" > <constructor-arg ref ="userDao" /> </bean > <bean id ="userService2" class ="com.ldy.service.impl.UserServiceImpl" > <constructor-arg ref ="userDao" /> <constructor-arg value ="ggbone" /> <constructor-arg value ="18" /> </bean > <bean id ="userService3" class ="com.ldy.service.impl.UserServiceImpl" > <constructor-arg name ="age" value ="18" /> <constructor-arg name ="userDao" ref ="userDao" /> <constructor-arg name ="name" value ="ggbone" /> </bean > <bean id ="userService4" class ="com.ldy.service.impl.UserServiceImpl" > <constructor-arg index ="2" value ="18" /> <constructor-arg index ="0" ref ="userDao" /> <constructor-arg index ="1" value ="ggbone" /> </bean >
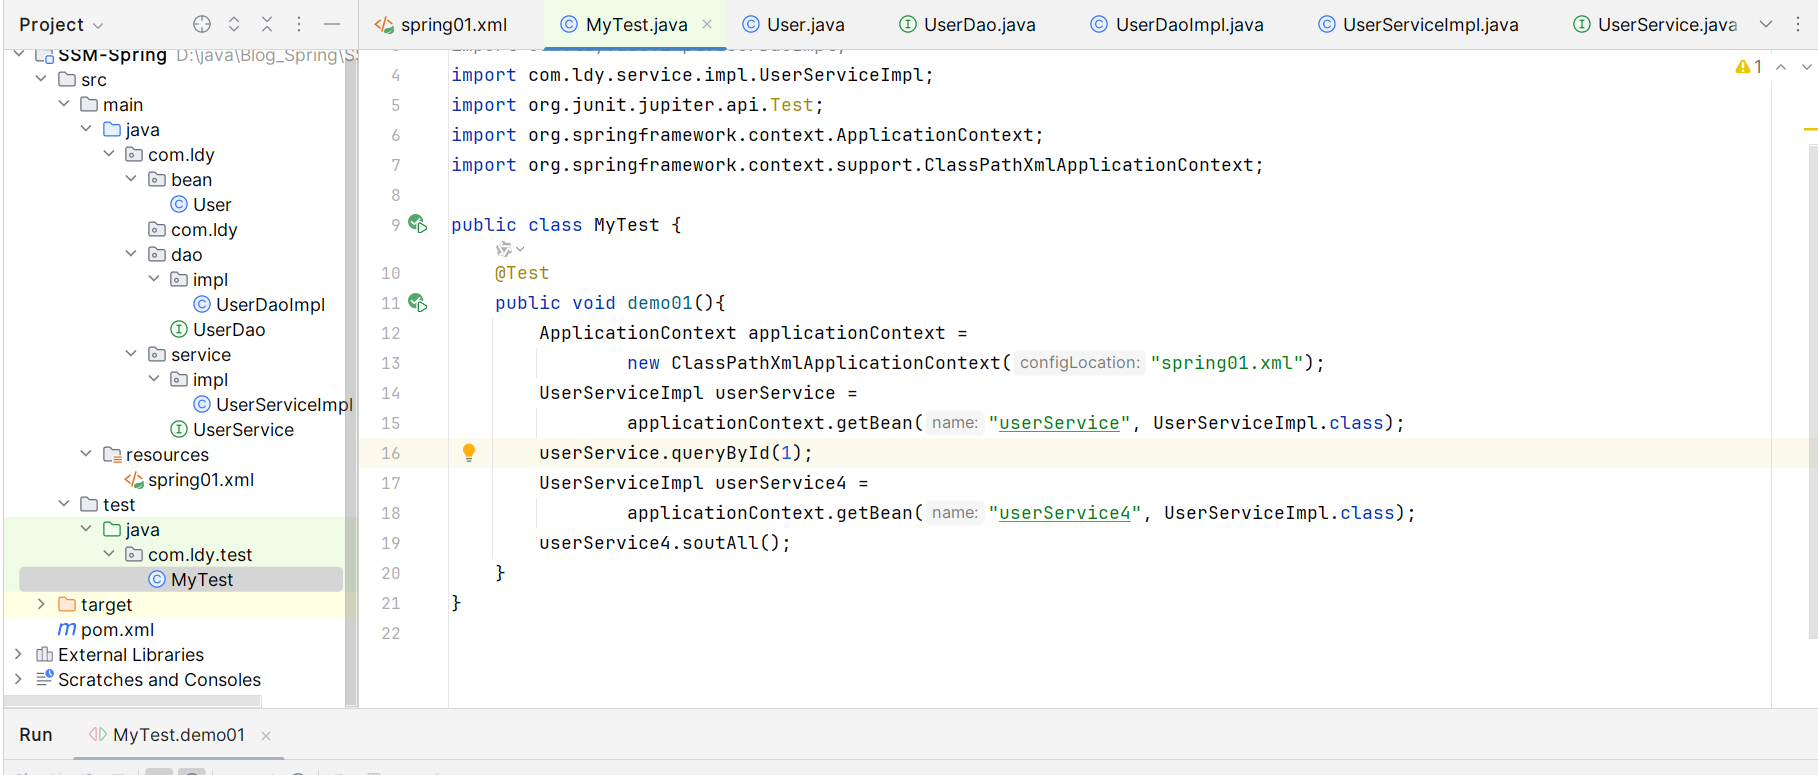
这里我们写一个测试类进行测试,看看是否能成功获取对象并执行方法。
测试时的ioc容器对象创建
1 2 3 4 5 6 7 8 9 10 11 12 13 14 15 16 17 18 19 20 ApplicationContext applicationContext = new ClassPathXmlApplicationContext ("spring-03.xml" );Person person = (Person)applicationContext.getBean("person" );Person person1 = applicationContext.getBean("person" , Person.class);Person person2 = applicationContext.getBean(Person.class);Animal animal = applicationContext.getBean(Animal.class);
推荐在test文件夹下面创建测试类,如下图所示。
这里我们可以看到成功的获取了对象和实现了相应的方法
3.其他细节内容 以下代码均是之前学习时的产物,没必要重新写了,就复制过来了
1.bean标签的属性
1 2 3 4 5 6 7 8 9 10 11 12 13 14 15 <bean id ="javaBean2" class ="com.ldy.ioc04.JavaBean" init-method ="init" destroy-method ="destroy" scope ="singleton" />
2.获取原始类
1 2 3 4 5 6 7 <bean id ="dataSource2" class ="com.alibaba.druid.pool.DruidDataSource" > <property name ="url" value ="jdbc:mysql://127.0.0.1:3306/test?serverTimezone=UTC" /> <property name ="driverClassName" value ="com.mysql.cj.jdbc.Driver" /> <property name ="username" value ="root" /> <property name ="password" value ="root" /> </bean >
3.配置文件赋值
1 2 3 4 5 6 7 8 9 10 11 <context:property-placeholder location ="classpath:druid.properties" /> <bean id ="dataSource3" class ="com.alibaba.druid.pool.DruidDataSource" > <property name ="username" value ="${xxx.username}" /> <property name ="password" value ="${xxx.password}" /> <property name ="driverClassName" value ="${xxx.driverClassName}" /> <property name ="url" value ="${xxx.url}" /> </bean >
4.配合注解进行包扫描
1
2
3
4
<!--指定包下面进行注解扫描 base-package: 包名,该包以下的所有类和子包中的所有类都会被扫描 --> <context:component-scan base-package="com.ldy"/>
三、基于配置类的方式管理bean Spring从2.5版本开始提供了对注解技术的全面支持,我们可以使用注解来实现自动装配,简化Spring的xml配置。
Spring通过注解实现自动装配:
引入依赖
开启组件扫描
使用注解定义Bean
依赖注入
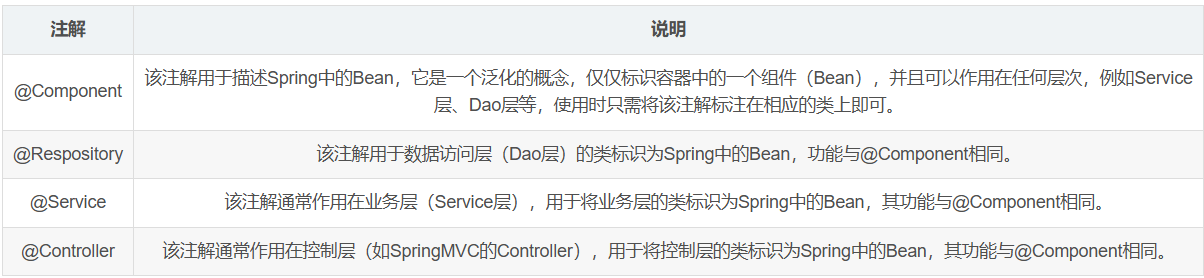
1.注解介绍 基本的类上注解
@ComponentScan用于批量注册bean。
这个注解会让spring去扫描某些包及其子包中所有的类,然后将满足一定条件的类作为bean注册到spring容器容器中。
@Autowired注入
@Autowired注解有一个required属性,默认值是true,表示在注入的时候要求被注入的Bean必须存在,如果不存在则报错。如果required属性设置为false,表示注入的Bean存在或者不存在都没关系,存在就注入,不存在也不报错。
@Qualifier搭配@Autowired使用
若@Autowired注入的类有多个实现类,需要指定某个实体类时,在@Autowired注解下面添加@Qualifier(“指定实现类的id”)来指定注入的实现类。
@Resource整合了@Autowired和@Qualifier一起的功能
指定@Resource中的name,则根据名称装配
未指定name时,则根据属性名装配
未指定name,属性名也不一致,则根据类型装配
使用该注解需要导入如下依赖
1 2 3 4 5 <dependency > <groupId > jakarta.annotation</groupId > <artifactId > jakarta.annotation-api</artifactId > <version > 2.1.1</version > </dependency >
@PropertySource配置文件引用
示例:@PropertySource(value=”classpath:jdbc.properties”),与xml的配置文件路径写法一致。
2.实际操作 1.简单操作
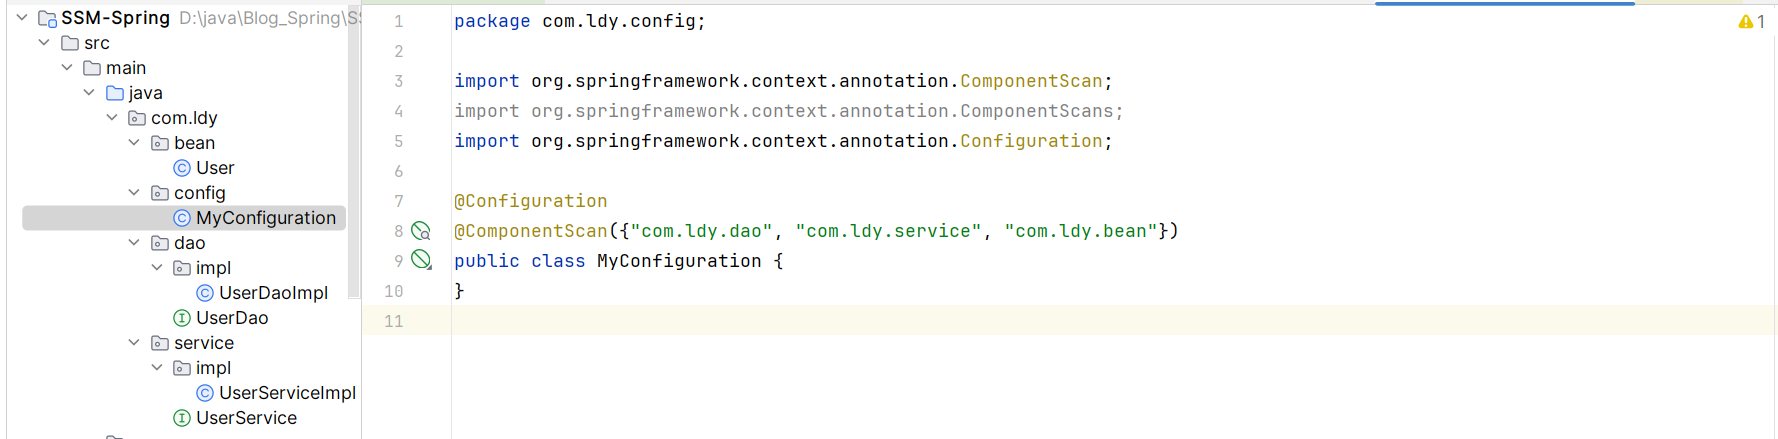
创建配置类
给各个组件添加注解,以下是其中一个类
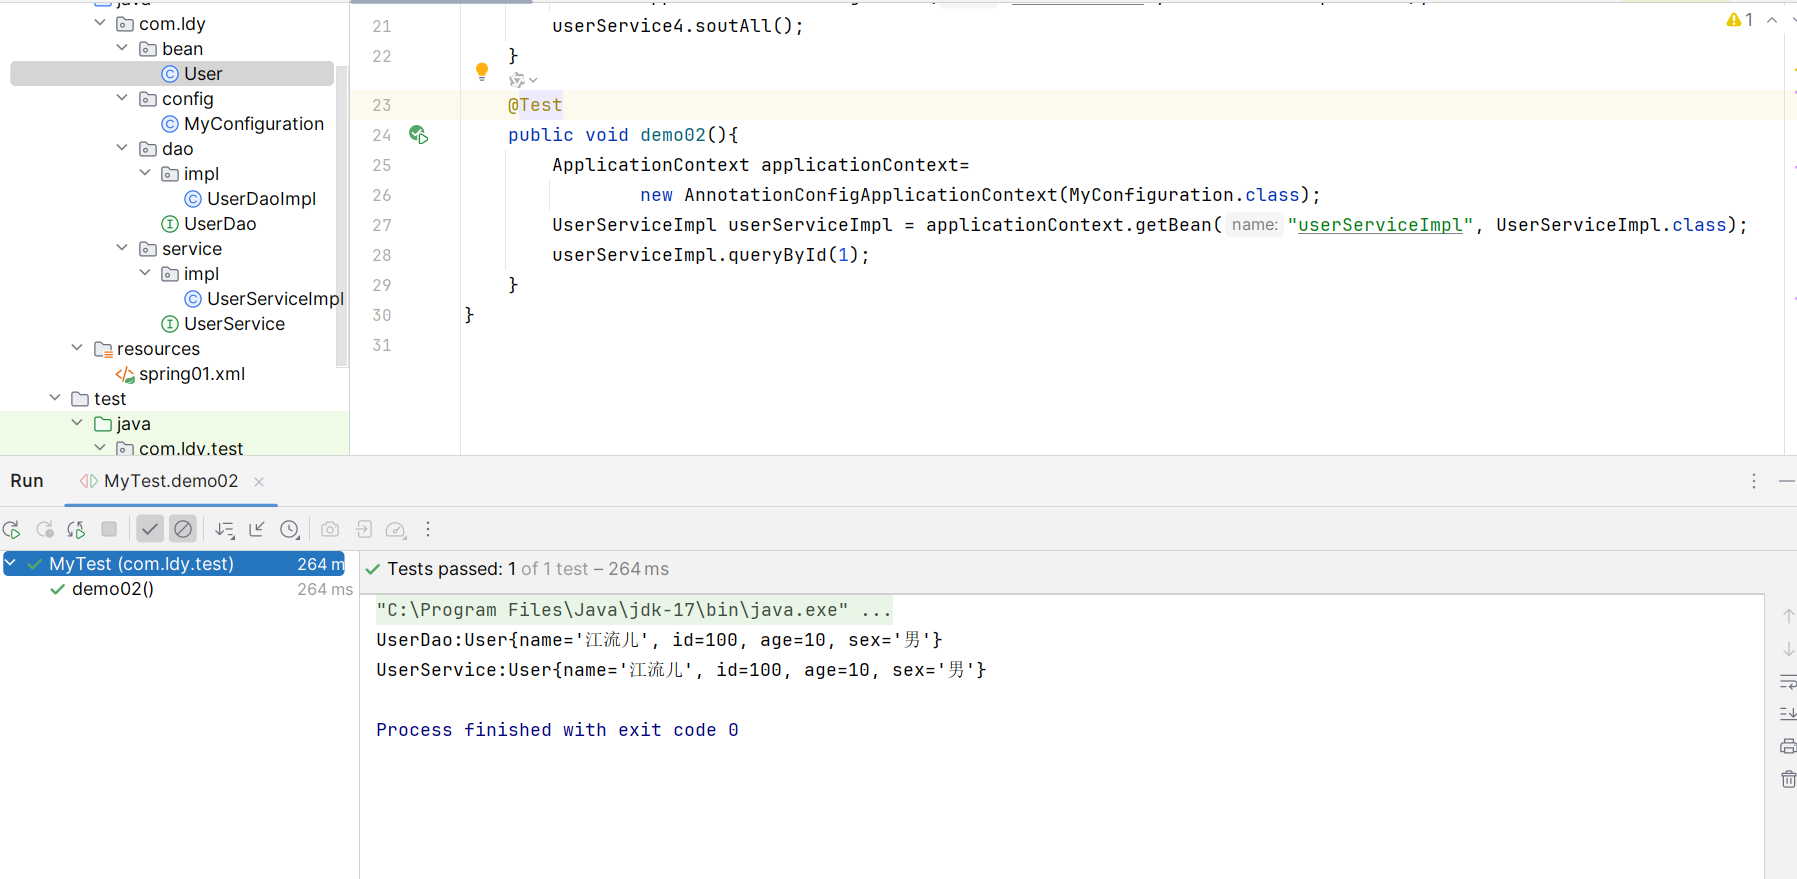
给之前写的类添加上上述注解之后,用AnnotationConfigApplicationContext获取ApplicationContext类进行测试。
2.详细内容
之前所学习时的配置类代码
1 2 3 4 5 6 7 8 9 10 11 12 13 14 15 16 17 18 19 20 21 22 23 24 25 26 27 28 29 30 @Configuration @ComponentScan(basePackages = "com.ldy") @PropertySource(value="classpath:jdbc.properties") public class JavaConfigure { @Bean public DataSource dataSource (@Value("${xxx.url}") String url, @Value("${xxx.driverClassName}") String driverClassName,@Value("${xxx.username}") String username, @Value("${xxx.password}") String password) { DruidDataSource dataSource = new DruidDataSource (); dataSource.setUrl(url); dataSource.setDriverClassName(driverClassName); dataSource.setUsername(username); dataSource.setPassword(password); return dataSource; } @Bean public JdbcTemplate jdbcTemplate (DataSource dataSource) { JdbcTemplate jdbcTemplate = new JdbcTemplate (); jdbcTemplate.setDataSource(dataSource); return jdbcTemplate; } }
四、总结 全注解开发就是不再使用spring配置文件了,写一个配置类来代替配置文件。用注解配置还是很方便的。