什么是RPC
我的理解是,RPC(远程过程调用)是一种让程序能够像调用本地函数一样调用远程服务的思想概念。而RPC协议,则是详细设计了通信的数据格式(如JSON、XML、Protobuf)、传输协议(TCP/HTTP等)和序列化方式,从而将复杂的网络通信细节封装起来。
任何人都可以定义自己的rpc协议,只要:
- 明确的格式规范:定义请求和响应数据的结构、字段、编码方式
- 完整的调用语义:包含方法标识、参数传递、返回值、错误处理机制
- 一致的序列化:双方使用相同的序列化/反序列化规则
基本功能实现
下面,我将完整介绍如何实现一个基本的RPC框架,主要涉及服务的注册和远程调用。
环境配置
创建一个Maven项目,然后分别创建如下四个模块
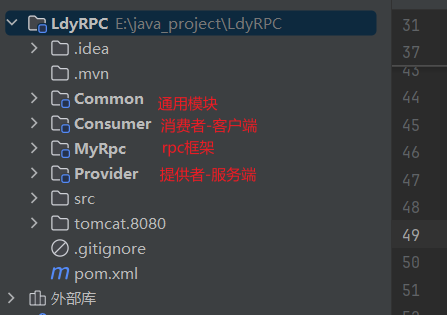
通用模块
通用模块存放了远程调用的接口和一些公共配置。消费者需要这个调用这个接口的远程实现。而服务端提供了这个接口的实现类,并可供消费者调用。
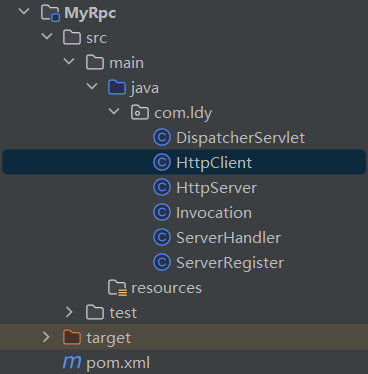
结构很简单,如图所示
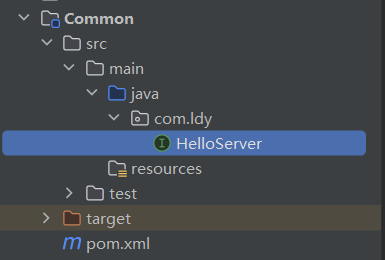
在common模块中定义一个HelloServer的接口
1
2
3
4
5
6
7
8
9
10
11
|
public interface HelloServer {
public String sayHello(String msg);
}
|
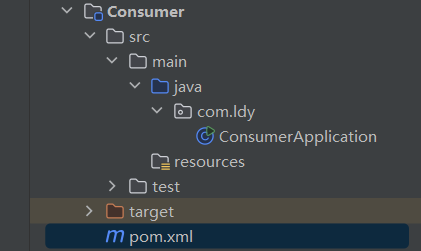
服务消费者
消费者中定义了启动类ConsumerApplication,通过调用RPC框架的api来进行远程方法的调用。具体方法内容的编写,看后面rpc框架实现的部分。
注意引入公共模块和rpc模块的依赖
1
2
3
4
5
6
7
8
9
10
11
12
13
| <dependencies>
<dependency>
<groupId>org.example</groupId>
<artifactId>Common</artifactId>
<version>1.0-SNAPSHOT</version>
</dependency>
<dependency>
<groupId>org.example</groupId>
<artifactId>MyRpc</artifactId>
<version>1.0-SNAPSHOT</version>
</dependency>
</dependencies>
|
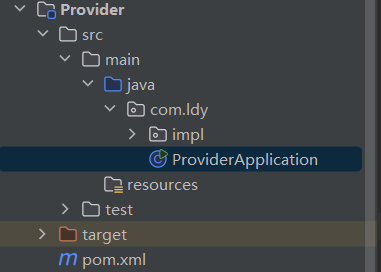
服务提供者
服务提供者模块定义了ProviderApplication,通过调用rpc框架的api来注册服务和启动服务。ProviderApplication的定义看rpc框架实现部分。
HelloServerImpl的实现
1
2
3
4
5
6
7
8
9
10
11
12
13
14
15
16
|
public class HelloServerImpl implements HelloServer {
@Override
public String sayHello(String msg) {
System.out.println("hello " + msg + ", this is provider");
return "perfect";
}
}
|
同样,记得配置依赖
1
2
3
4
5
6
7
8
9
10
11
12
13
| <dependencies>
<dependency>
<groupId>org.example</groupId>
<artifactId>Common</artifactId>
<version>1.0-SNAPSHOT</version>
</dependency>
<dependency>
<groupId>org.example</groupId>
<artifactId>MyRpc</artifactId>
<version>1.0-SNAPSHOT</version>
</dependency>
</dependencies>
|
自定义Rpc框架
要想实现Rpc框架,我们就需要考虑几个问题:
- 服务端要实现服务启动和服务注册
- 客户端要实现服务请求发送
- rpc框架要定义好通用的数据通信对象
依赖
1
2
3
4
5
6
7
8
9
10
11
12
13
14
15
16
17
18
19
20
| <dependencies>
<dependency>
<groupId>org.apache.tomcat.embed</groupId>
<artifactId>tomcat-embed-core</artifactId>
<version>8.5.31</version>
</dependency>
<dependency>
<groupId>org.projectlombok</groupId>
<artifactId>lombok</artifactId>
<version>1.18.38</version>
</dependency>
<dependency>
<groupId>cn.hutool</groupId>
<artifactId>hutool-all</artifactId>
<version>5.8.42</version>
</dependency>
</dependencies>
|
HttpServer服务端启动类
这里使用了Tomcat来启动服务。注意导入tocat的依赖包。
1
2
3
4
5
6
7
8
9
10
11
12
13
14
15
16
17
18
19
20
21
22
23
24
25
26
27
28
29
30
31
32
33
34
35
36
37
38
39
40
41
42
43
44
45
46
47
48
49
50
51
52
53
|
public class HttpServer {
public void start(String hostName, Integer port){
Tomcat tomcat = new Tomcat();
Server server = tomcat.getServer();
Service service = server.findService("Tomcat");
Connector connector = new Connector();
connector.setPort(port);
Engine engine = new StandardEngine();
engine.setDefaultHost(hostName);
StandardHost host = new StandardHost();
host.setName(hostName);
String contextPath = "";
StandardContext context = new StandardContext();
context.setPath(contextPath);
context.addLifecycleListener(new Tomcat.FixContextListener());
host.addChild(context);
engine.addChild(host);
service.setContainer(engine);
service.addConnector(connector);
tomcat.addServlet(contextPath, "dispatcher", new DispatcherServlet());
context.addServletMapping("/*", "dispatcher");
try{
tomcat.start();
tomcat.getServer().await();
} catch (LifecycleException e) {
e.printStackTrace();
}
}
}
|
DispatcherServlet自定义请求处理中转类
1
2
3
4
5
6
7
8
9
10
11
12
13
14
15
16
17
18
19
20
|
public class DispatcherServlet extends HttpServlet {
@Override
protected void service(HttpServletRequest req, HttpServletResponse resp) throws ServletException, IOException {
ServerHandler serverHandler = new ServerHandler();
try {
serverHandler.handle(req, resp);
} catch (Exception e) {
throw new RuntimeException(e);
}
}
}
|
ServerHandler请求处理类
具体定义了如何去处理请求
1
2
3
4
5
6
7
8
9
10
11
12
13
14
15
16
17
18
19
20
21
22
23
24
25
26
27
28
29
|
public class ServerHandler {
public void handle(HttpServletRequest req, HttpServletResponse resp) throws Exception {
Invocation invocation = (Invocation) new ObjectInputStream(req.getInputStream()).readObject();
Object instance = ServerRegister.getInstance(invocation.getInterfaceName());
Method method = instance.getClass().getMethod(invocation.getMethodName(), invocation.getParameterTypes());
method.setAccessible(true);
Object res = method.invoke(instance, invocation.getParameters());
try(ServletOutputStream outputStream = resp.getOutputStream();){
ObjectOutputStream oos = new ObjectOutputStream(resp.getOutputStream());
oos.writeObject(res);
}
}
}
|
Invocation通用请求调用类
规定了通信的内容。即要明确远程调用什么类、它的什么方法、它的参数类型是什么、参数是什么。
1
2
3
4
5
6
7
8
9
10
11
12
13
14
15
16
17
18
19
20
21
22
23
24
25
26
27
28
29
30
31
|
@Data
@AllArgsConstructor
public class Invocation implements Serializable {
private String interfaceName;
private String methodName;
private Class[] parameterTypes;
private Object[] parameters;
}
|
ServerRegister服务方法注册器
服务启动时,将提供的方法对象的实例注册到该注册器中,当需要远程过程调用时,即可通过反射的方式去调用相应的方法
1
2
3
4
5
6
7
8
9
10
11
12
13
14
15
16
17
18
19
20
21
22
23
24
25
26
27
28
29
30
31
|
public class ServerRegister {
private static HashMap<String, Object> serverMaps = new HashMap<>();
public static void register(String serverName, Object instance){
if (serverMaps.containsKey(serverName)) {
System.out.println(serverName + "存在相同名称的服务已注册");
return;
}
serverMaps.put(serverName, instance);
}
public static Object getInstance(String serverName) throws Exception {
Object o = serverMaps.get(serverName);
return Optional.ofNullable(o)
.orElseThrow(() -> new Exception("服务实例不存在"));
}
}
|
HttpClient客户端请求类
定义了客户端发送远程调用请求的具体实现。
1
2
3
4
5
6
7
8
9
10
11
12
13
14
15
16
17
18
19
20
21
22
23
24
25
26
27
28
29
30
31
32
33
34
35
36
37
38
|
public class HttpClient {
public String send(String hostName, Integer port, Invocation invocation) throws Exception {
URL url = new URL("http", hostName, port, "/");
HttpURLConnection urlConnection = (HttpURLConnection)url.openConnection();
urlConnection.setRequestMethod("POST");
urlConnection.setDoOutput(true);
OutputStream os = urlConnection.getOutputStream();
ObjectOutputStream oos = new ObjectOutputStream(os);
oos.writeObject(invocation);
oos.flush();
oos.close();
InputStream is = urlConnection.getInputStream();
ObjectInputStream ois = new ObjectInputStream(is);
Object o = ois.readObject();
return JSONUtil.toJsonStr(o);
}
}
|
实现ProviderApplication
1
2
3
4
5
6
7
8
9
10
11
12
13
14
15
16
17
18
|
public class ProviderApplication {
public static void main(String[] args) {
ServerRegister.register(HelloServer.class.getSimpleName(), new HelloServerImpl());
HttpServer httpServer = new HttpServer();
httpServer.start("localhost", 8080);
}
}
|
实现ConsumerApplication
1
2
3
4
5
6
7
8
9
10
11
12
13
14
15
16
17
18
19
20
21
22
|
public class ConsumerApplication {
public static void main(String[] args) throws Exception {
HttpClient httpClient = new HttpClient();
Invocation invocation = new Invocation(
HelloServer.class.getSimpleName(),
"sayHello",
new Class[]{String.class},
new Object[]{"ldy"});
String res = httpClient.send("localhost", 8080, invocation);
System.out.println(res);
}
}
|
高级功能实现
高级功能的实现代码,在上面代码的基础上有较大改动,只贴出部分关键代码。完整源码上传至github。
一、动态代理
在上基础功能中,我们本地服务在调用远程服务时,需要消费者主动调用HttpClient的方法,并手动封装Invocation。这显然不够方便。所以,为了能够像OpenFeign一样,只需要调用接口的方法就好了。我们这里就可以使用动态代理的方式,给接口创建一个动态代理的实现类。
在Rpc框架下新建proxy包。创建一个ProxyHelper类来帮助我们创建代理对象。在代理类内部疯转Invocation对象,并调用HttpClient发起调用远程调用请求。这样子,消费者只需要通过该类创建接口的代理对象,然后直接调用方法就可以获取到结果了。
下面代码是完整的代码,包含了负载均衡和服务降级的逻辑。
1
2
3
4
5
6
7
8
9
10
11
12
13
14
15
16
17
18
19
20
21
22
23
24
25
26
27
28
29
30
31
32
33
34
35
36
37
38
39
40
41
42
43
44
45
46
47
48
49
50
51
52
53
54
55
56
57
58
59
60
61
62
63
64
65
66
67
68
69
70
71
72
73
74
75
76
77
78
|
@Slf4j
public class ProxyHelper {
public static <T> T getProxyInstance(Class<T> interfaceClass) throws InstantiationException, IllegalAccessException {
Object o = Proxy.newProxyInstance(Thread.currentThread().getContextClassLoader(), new Class[]{interfaceClass}, new InvocationHandler() {
@Override
public Object invoke(Object proxy, Method method, Object[] args) throws Throwable {
Invocation invocation = new Invocation(
interfaceClass.getName(),
method.getName(),
method.getParameterTypes(),
args);
List<URL> urLs = MapRemoteRegister.getURLs(interfaceClass.getName());
String jsonStr = null;
int max = 3;
while(max > 0){
URL url = LoadBalance.getRandom(urLs);
try{
jsonStr = HttpClient.send(url.getHost(), url.getPort(), invocation);
break;
}catch(Exception e){
log.info("第{}次--服务器{}:{}的{}类的{}方法调用异常", (4-max), url.getHost(), url.getPort(), interfaceClass.getName(), method.getName());
System.out.println(url.getHost() + ":" + url.getPort() + ",远程调用异常" + (4 - max));
}
max --;
if(max == 0){
Object callBack = CallBackRegister.getCallBack(interfaceClass.getName());
if(callBack != null){
return method.invoke(callBack, args);
}
}
}
if(jsonStr == null){
System.out.println("远程调用失败,达到最大重试次数,且无降级处理类");
}
Class<?> returnType = method.getReturnType();
if(returnType == String.class){
return jsonStr;
}
Object res = JSONUtil.toBean(jsonStr, returnType);
return res;
}
});
return (T) o;
}
}
|
二、服务注册
当前代码中,消费者调用远程服务需要知道服务提供者的URL信息才行,当存在多个提供相同服务的实例时,消费者就不好确定给哪个提供者发起请求,且管理提供者也很麻烦,所以我们需要引入一个注册中心,这样子消费者就无需关心提供者的URL信息,只需要知道注册中心的URL,由注册中心返回给消费者服务提供者的URL信息,从而减轻消费者的维护负担。
一个注册中心主要维护的就是服务和提供服务实例的映射关系。一般来说会使用redis或者zookeeper这种分布式数据管理中间件来实现。但这里为了方便实现。直接通过本地文件充当注册中心的方式来实现。
首先创建一个远程注册服务的类,该类提供了将服务全类名和服务提供者的URL信息注册到注册中心(本地文件)的方法。
1
2
3
4
5
6
7
8
9
10
11
12
13
14
15
16
17
18
19
20
21
22
23
24
25
26
27
28
29
30
31
32
33
34
35
36
37
38
39
40
41
42
43
44
45
46
47
48
49
50
51
52
53
54
55
56
57
58
59
60
|
public class MapRemoteRegister {
public static HashMap<String, List<URL>> remoteMap = new HashMap<>();
public static void register(String interfaceName, URL url){
List<URL> urls = remoteMap.get(interfaceName);
if(urls == null){
urls = new ArrayList<>();
remoteMap.put(interfaceName, urls);
}
urls.add(url);
saveFile();
}
public static List<URL> getURLs(String interfaceName){
List<URL> urls = null;
try {
urls = getMapByFile().get(interfaceName);
} catch (Exception e) {
throw new RuntimeException(e);
}
return urls;
}
public static Map<String, List<URL>> getMapByFile() throws Exception {
try(ObjectInputStream ois = new ObjectInputStream(new FileInputStream("./temp.txt"));){
return (Map) ois.readObject();
}
}
public static void saveFile(){
try(ObjectOutputStream oos = new ObjectOutputStream(new FileOutputStream("./temp.txt"));){
oos.writeObject(remoteMap);
} catch (IOException e) {
throw new RuntimeException(e);
}
}
}
|
服务提供者只需要调用register方法即可将服务信息写入注册中心。而服务调用方可以通过getURLs方法从注册中心里获取提供对应服务的URL地址信息集合。
1
2
| //注册远程调用提供的服务
ServerRegister.register(HelloServer.class.getName(), new HelloServerImpl());
|
三、负载均衡
负载均衡的目的是为了让消费者获取到当前可用的最不繁忙的服务提供者提供的URL信息。这部分既可以在消费者端进行,也可以直接在注册中心进行处理。因为我们的注册中心是存放在本地文件的,所以负载均衡的部分就交给消费者端调用了。
首先创建一个负载均衡的工具类。
1
2
3
4
5
6
7
8
9
10
11
12
13
14
15
16
17
18
19
20
|
public class LoadBalance {
public static URL getRandom(List<URL> urls){
Random random = new Random();
int target = random.nextInt(urls.size());
return urls.get(target);
}
}
|
然后在创建动态代理类的方法上添加获取url地址的方法。完整代码看动态代理部分。
1
2
3
4
|
List<URL> urLs = MapRemoteRegister.getURLs(interfaceClass.getName());
URL url = LoadBalance.getRandom(urLs);
|
四、服务降级
为了保证当远程服务不可用时有一个兜底策略。我们需要再创建一个注册降级服务的类,当远程服务不可用时,就在调用本地对该接口的实现类的方法。
1
2
3
4
5
6
7
8
9
10
11
12
13
14
15
16
17
18
19
20
21
22
|
public class CallBackRegister {
private static Map<String, Object> callBackMap = new HashMap<>();
public static void register(String interfaceName, Object instance){
callBackMap.put(interfaceName, instance);
}
public static Object getCallBack(String interfaceName){
return callBackMap.get(interfaceName);
}
}
|
然后在消费者端创建接口的实现类并注册
1
2
3
4
5
6
7
8
9
10
11
12
13
14
|
public class HelloServerCallBack implements HelloServer {
@Override
public Person sayHello(String msg) {
return new Person("down");
}
}
|
1
2
3
4
5
6
7
8
9
10
11
12
| public class ConsumerApplication {
public static void main(String[] args) throws Exception {
CallBackRegister.register(HelloServer.class.getName(), new HelloServerCallBack());
HelloServer proxyInstance = ProxyHelper.getProxyInstance(HelloServer.class);
Person res = proxyInstance.sayHello("你好,我是ldy");
System.out.println(res.toString());
}
}
|
同时,也要在动态代理部分检测降级类是否存在,当服务重试次数到达上限时,就可用通过调用降级类来实现业务兜底,而不是直接抛出异常。
实现适配Springboot的starter依赖
在rpc框架基础上,开发一个springboot-rpc-starter依赖。使用springboot自动配置特性、提供自定义注解、自定义配置和利用redis实现注册中心的访问。
该starter依赖是我参照OpenFeign的使用方法实现的。
源码仓库:qcqwy/LdyRpc: 手写自定义的rpc框架
自定义注解
@EnableRpcClient
该注解用在Springboot的启动类上,用于指明包含远程调用接口的包名。其中的@Import注解和里面的RpcClientRegistrar是关键。
1
2
3
4
5
6
7
8
9
10
11
12
13
14
15
16
17
18
19
20
|
@Target({ElementType.TYPE})
@Retention(RetentionPolicy.RUNTIME)
@Documented
@Import({RpcClientRegistrar.class})
public @interface EnableRpcClients {
String[] basePackages();
}
|
@RpcClient
该注解是用于远程调用接口的类上的,指明远程调用的服务实例名称
1
2
3
4
5
6
7
8
9
10
11
12
13
14
15
16
17
18
19
20
21
22
23
24
25
|
@Target(ElementType.TYPE)
@Retention(RetentionPolicy.RUNTIME)
@Documented
@Inherited
public @interface RpcClient {
String value();
String version() default "1.0";
}
|
通过自定义注解将自定义组件注册到ioc容器
原理:
- @Import 注解中的配置类会先被处理
- 对于ImportBeanDefinitionRegistrar 的 实现类,registerBeanDefinitions 方法会被调用
所以,我们主要就是去实现ImportBeanDefinitionRegistrar这个类,通过registerBeanDefinitions 方法,去扫描指定包路径下包含自定义注解的接口,因为注册器要求的参数是一个bean名称和一个bean工厂,所以我们要通过创建一个bean工厂,创建这个接口的实现类,所以我们的动态代理也需要在这个bean工厂里去完成。
RpcClientRegistrar
1
2
3
4
5
6
7
8
9
10
11
12
13
14
15
16
17
18
19
20
21
22
23
24
25
26
27
28
29
30
31
32
33
34
35
36
37
38
39
40
41
42
43
44
45
46
47
48
49
50
51
52
53
54
55
56
57
58
59
60
61
62
63
64
65
66
67
68
69
70
71
72
73
74
75
76
77
78
79
80
81
82
83
| public class RpcClientRegistrar implements ImportBeanDefinitionRegistrar {
@Override
public void registerBeanDefinitions(AnnotationMetadata importingClassMetadata,
BeanDefinitionRegistry registry) {
Map<String, Object> enableRpcClientsAttrs =
importingClassMetadata.getAnnotationAttributes(EnableRpcClients.class.getName());
String[] basePackages = (String[])enableRpcClientsAttrs.get("basePackages");
ClassPathScanningCandidateComponentProvider scanner =
new ClassPathScanningCandidateComponentProvider(false){
@Override
protected boolean isCandidateComponent(AnnotatedBeanDefinition beanDefinition) {
return true;
}
};
scanner.addIncludeFilter(new AnnotationTypeFilter(RpcClient.class));
for (String basePackage : basePackages) {
Set<BeanDefinition> candidates = scanner.findCandidateComponents(basePackage);
for (BeanDefinition candidate : candidates) {
System.out.println(candidate.getBeanClassName());
registerRpcClientBean(registry, candidate.getBeanClassName());
}
}
}
private void registerRpcClientBean(BeanDefinitionRegistry registry, String className) {
try{
String beanName = getBeanName(className);
if(registry.containsBeanDefinition(beanName)){
return;
}
BeanDefinitionBuilder builder = BeanDefinitionBuilder
.genericBeanDefinition(RpcClientFactoryBean.class);
builder.addConstructorArgValue(Class.forName(className));
builder.setScope("singleton");
registry.registerBeanDefinition(beanName, builder.getBeanDefinition());
}catch (ClassNotFoundException e){
throw new RuntimeException("无法加载类:" + className, e);
}
}
private String getBeanName(String className){
String res = className.substring(className.lastIndexOf('.') + 1);
return res;
}
}
|
RpcClientFactoryBean
动态代理类中编写发起http远程请求的方法
1
2
3
4
5
6
7
8
9
10
11
12
13
14
15
16
17
18
19
20
21
22
23
24
25
26
27
28
29
30
31
32
33
34
35
36
37
38
39
40
41
42
43
44
45
46
47
48
49
50
51
52
53
54
55
56
57
58
59
60
61
62
63
64
65
66
67
68
69
70
71
72
73
74
75
76
77
78
79
80
81
82
83
84
85
86
87
88
89
90
91
92
93
94
95
96
97
98
99
100
101
102
103
104
105
106
107
108
109
110
111
112
113
|
@Slf4j
public class RpcClientFactoryBean<T> implements FactoryBean {
private Class<T> interfaceType;
public RpcClientFactoryBean(Class<T> interfaceType){
this.interfaceType = interfaceType;
}
@Nullable
@Override
public Object getObject() throws Exception {
return Proxy.newProxyInstance(
Thread.currentThread().getContextClassLoader(),
new Class[]{interfaceType},
new InvocationHandler() {
@Override
public Object invoke(Object proxy, Method method, Object[] args) throws Throwable {
RpcClient rpcClient = interfaceType.getAnnotation(RpcClient.class);
String serviceName = rpcClient.value();
List<URL> urLs =
MapRemoteRegister.getURLs(serviceName);
URL url = LoadBalance.getRandom(urLs);
RequestMapping annotation = AnnotatedElementUtils.findMergedAnnotation(method, RequestMapping.class);
String path = annotation.value().length == 0 ? "" : annotation.value()[0];
RequestMethod requestMethod = annotation.method().length == 0 ? RequestMethod.POST : annotation.method()[0];
RpcRequest rpcRequest = new RpcRequest(path, requestMethod.name(), null, null);
Annotation[][] parameterAnnotations = method.getParameterAnnotations();
HashMap<String, Object> headers = new HashMap<>();
int i = 0;
for (Annotation[] parameterAnnotation : parameterAnnotations) {
boolean flag = true;
for (Annotation ann : parameterAnnotation) {
if(ann instanceof RequestBody){
rpcRequest.setBodyParameter(args[i]);
flag = false;
}
else if(ann instanceof RequestParam){
String pname = ((RequestParam) ann).value();
headers.put(pname, args[i]);
flag = false;
}
}
if(flag){
headers.put(method.getParameters()[i].getName(), args[i]);
}
i++;
}
rpcRequest.setQueryParameters(headers);
String jsonStr = null;
try{
jsonStr = HttpClient.send(url.getHost(), url.getPort(), rpcRequest);
}catch (Exception e){
log.error("远程调用请求失败");
e.printStackTrace();
}
if(method.getReturnType() == String.class){
return jsonStr;
}
return JSONUtil.toBean(jsonStr, method.getReturnType());
}
}
);
}
@Nullable
@Override
public Class<?> getObjectType() {
return interfaceType;
}
@Override
public boolean isSingleton() {
return true;
}
}
|
服务端注册服务实例信息到注册中心
服务端主要是给注册中心提供自身服务的名称和URL信息。所以我通过配置文件的方式来实现的。
ServerProperty
从配置文件中获取服务信息
1
2
3
4
5
6
7
8
9
10
11
12
13
14
15
16
17
18
19
20
21
22
23
24
25
26
|
@ConfigurationProperties(prefix = "ldy.rpc.server")
@Data
public class ServerProperty {
private String name;
private String hostName = "127.0.0.1";
private Integer port = 8080;
}
|
ServerConfiguration
当配置文件的内容存在时,就注册到ioc容器中,并在生命周期的初始化阶段通过调用rpc框架提供的注册api,将配置文件的信息写入注册中心。
1
2
3
4
5
6
7
8
9
10
11
12
13
14
15
16
17
18
19
20
21
22
23
|
@Configuration
@ConditionalOnProperty(prefix = "ldy.rpc.server", name = "enable", havingValue = "true", matchIfMissing = false)
@EnableConfigurationProperties(ServerProperty.class)
public class ServerConfiguration implements InitializingBean {
@Autowired
ServerProperty serverProperty;
@Override
public void afterPropertiesSet() throws Exception {
MapRemoteRegister.register(serverProperty.getName(), new URL(serverProperty.getHostName(), serverProperty.getPort()));
}
}
|
最后,不能忘记因为我们rpc是依赖,默认是不会加载到ioc容器里的,所以需要按照springboot约定,将需要自动配置的类的全类名写入到对应文件里。
1
| com.ldy.server.config.ServerConfiguration
|
这样子,一个最简易的springboot-ldyRpc-starter依赖就实现了。
后续
后续会不断往这个框架里面新增内容。